Table of Contents
The Desktop Publisher
| Company | Database Software |
|---|---|
| Distributor | Database Software |
| Year | 1987 |
| Packaging | Black hard plastic case 17.00×17.20×3.30 |
| Compatibility | PCW 8256 - PCW 8512 - PCW 9512 |
| Peripherals | Keyboard - Mouse |
| Load | CP/M+ |
| Gender | Graphic design |
| Language | English |
| Price | England: £29.95 |
| State | Preserved |
Screenshots
Description
The microcomputer boom gave way to various software revolutions. This was due to the fact that, at more or less regular intervals of time, microcomputer versions of applications appeared on the market that until recently had only been available on higher-end computers (minis or mainframes), bringing these applications closer to a greater number of users, with the consequent echo in specialized magazines and the “snowball” effect that this entailed as many readers discovered, through magazines, those applications that perhaps they did not know they could get for their microcomputer.
Desktop programs or page editors are basically programs that allow you to create something similar to a newspaper or brochure sheet. With an application of this type, patience and some practice it is possible to make, for example, a school magazine, small-scale “advertising” posters, and so on.
Basically, these programs are made up of a graphics editor, a text editor, various character fonts and a part in charge of the printer, in addition to normal utilities in any program, such as disk management, copy of screen pieces, reversal of inks, etc.
At first they were designed for PCs and professional use, as we said before, but as expected and seeing their multiple applications, it was seen that they could be used in less ambitious projects. With them you could “play” at printing a newspaper, experimenting with the tasks of composition, layout, illustration, assembly, printing or, of course, simply use it as a drawing program. This is how this type of programs began to appear for PCWs.
Among the “Desktop Publishing” programs, one of the most widely accepted was DTP. But with the adaptation of the software not all the problems were solved, since it was not possible to take advantage of all the possibilities that this program presented to us. It was necessary to develop the hardware that would allow us to entertain ourselves to the maximum with this “little jewel”.
With the appearance of mice, scanners, graphic tablets, etc, and the efforts of some stores to offer integrated desktop publishing packages, they tried to solve the problem.
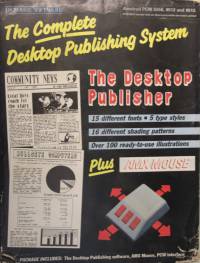
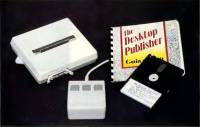
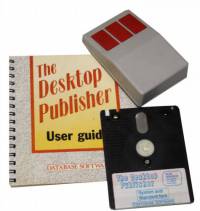
Then everything was easier. Database Software, launched a desktop publishing system that, although not all the desirable hardware was included, could be a great start so that the PCW did not have to envy other computers, this system was called “THE COMPLETE DESKTOP PUBLISHING SYSTEM”, it was composed of three elements that make up the system; Interface, mouse and software. The set, with the assembly instructions and the program's user guide, came in a white cork box and its connection to the computer could not be easier..
The Desktop Publisher is included in this type of application and responds quite well to the general characteristics outlined above.
Interface
It was presented in a plastic box, with its shape adapted to the place where the expansion port is located on the monitor, in case we wanted to screw it or leave it fixed. Inside we found a connector to connect it to the expansion bus, a multipin where we connected the mouse (on one side) and on the front, we had the entire expansion port at our disposal. Its interior could not be simpler, it is made up of two printed circuits. In one of them we have a series of integrated circuits (chips) and the mouse connector, and the other is the one that serves as a bridge between the computer's expansion bus and its new access from the interface. Although the instruction sheet came in English, there was no problem when connecting it and the only concern that had to be taken was that the computer was turned off.
The mouse
Manufactured by Logitech, it is the same house that made the mouse for Kempston when, a couple of years ago, this veteran peripheral manufacturer decided to release the “Kempston Mouse”. This, together with Logitech's reputation for the good finish of its products, guarantees us the experience of this brand in this type of hardware for PCWs. It is a AMX type mouse with three function keys and very smooth to handle, it weighs little and access to the mouse is simple, which makes it easy to clean.
Software in Spain
The first thing that deserves to be highlighted before entering it is that both the program and the user guide come in Spanish. Once the interface and the mouse are connected, and the program is installed, what we will do is call the Options Menu to initialize it and select the correct type of mouse. For example the most common the AMX. It has three buttons: the one on the left is used to set options, the one on the right to cancel and the one in the center to call up the Options Menu at any time.
In this menu we have the Step Area option, which allows us to control the movement of the pointer making them faster or finer.
The “DTP” is made up of three different modules, each of which performs a series of specific tasks. These modules are: Page Editor, Text Editor and Graphics Editor.
In the first two editors we hardly appreciate the advantage of having a mouse (only the speed of access to the menus), but in the Graphics Editor it is where we will really see the comfort of working with it. This is where we will get more out of the Step Area (options menu), managing the program with the keyboard is not appreciated, and finally we can draw “freehand”, since, due to the way that the PCW has to read the keyboard, without mouse is not effective.
Flexibility
Desktop Publisher was one of the most popular desktop publishing programs among PCW users in Spain and one of the first applied to the composition of pages that arrived in our country.
Most of the users who bought DTP were looking for a program like Dr. Draw Master Paint and so on. That is to say, rather drawing programs or desktop publishing at a low level that had nothing to do with what they had really acquired. Others, on the contrary, use it for its purpose: the design of pages at a high level. One and others cover your desktop publishing needs with full satisfaction.
This is one of the features that stands out in this program, starting with its control, since we can use the keyboard or any one of three different mice: Kempston, Electric Studio or AMX.
Throughout the program, the control of the options is carried out through windows and pointers, in the manner of the GEM of the PC1512. This has the advantage of not needing to type commands or abbreviations or key combinations (in fact we only need to use the keys if we want to add a new name to the file list in the save a file option), but it has the small disadvantage that If you don't have a mouse, you have to use the cursor keys, which is not as fast as a mouse. Still, it's very manageable, and we can adjust the speed of the cursor keys to our liking.
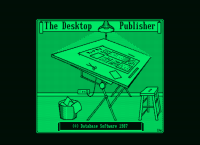
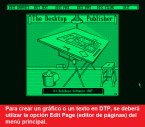
When starting the program, after a nice splash screen, we find the main options bar, which includes these options: Graphics Editor, Text Editor, Page Editor, Character Fonts Editor, Disk Manager, Exit. Selecting one is as simple as pointing at it with the mouse arrow and pressing the “activate” key.
With this series of comments, the possible applications that Desktop Publisher can have will be shown. But let's talk about the options menu, which although it does not appear directly on the screen, it can be accessed using the INS key on the keyboard and both mouse buttons if you are using this peripheral.
In this menu there are seven possibilities that affect the use of the DTP itself: Mouse, indicates the program that has to use the mouse (we previously mentioned the three possible ones); Pad Area, depending on the area, it will make larger or shorter cursor movements; Drive A or B, select the drive of work; Line Lock, when a window is designed in DTP, it has to be placed in a certain place by moving it with the cursor. When Line Lock is activated, the window is automatically fixed in the original position without allowing those displacements. And lastly, two more options: Invert, inverts the screen colors, and Save, saves all the changes that have occurred in the DTP installation to disk, to use them later when starting the program.
Page editor
Let's start with this option, since it must necessarily be the first. The page creation structure fits into the general flexibility of the program. We work on A4 paper (in theory, but we'll talk about this later when we talk about printing), and we have it represented on the right side of the monitor.
Normally, the user who wants to make a drawing will try to access the graphics editor directly. But the surprise can be great when you verify that to enter the program editor it will request the name of a file, which of course must already be created. So the person who is trying to create it may think their program is buggy or not accessing it correctly. The latter is what happens, DTP requests that all files be created, both graphics and text, with the page editor.
Once this last editor is activated from the menu, a second line of options will appear where all the possibilities available for treating a page will be found: Modes, Font, Print, Preview, Create, File.
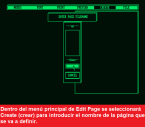
As in any operation where the data must be saved, it is necessary to define a place for its storage. In this way, the user who decides to create a database will need to tell the program where he wants to leave that data. In DTP the same thing happens, it is necessary to create a file to store the layout of the page. For this purpose, the Create option will be selected.
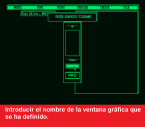
Once this option is selected, a menu will appear asking for the name of the page to be created. You must not give a name that already exists, or else it will give an error message. To enter the name, move the cursor to the window located above the word CANCEL, press RETURN and enter the file name.
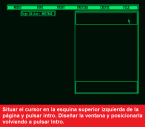
The page is already created. Now you should begin to include the different areas that are intended to be used for graphics and texts. How are these zones created? To do this, you must access the MODES menu, where you will find all the necessary tools for this process.
These tools are the following: Add Graphics Window, through this option you can add a graphic window that is already defined on the disk; Add Text Window, its function is the same as for the previous one except that it is done on the text files; Move Window allows you to move a window (either graphic or text) that was already created and located in one place on the page to a different one; Remove Window deletes an already defined window; Create Graphics Window, creates a graphics window, Create Text Window, does the same as the previous option but for text windows; Show Window Name placing the cursor on a graphic window indicates the name of the file to which it belongs; Show Text Window Font, its operation is the same as the previous one, except that instead of acting on graphic windows, it acts on texts indicating the type of font (the types it uses are detailed later).
Once the page has been designed at the placement level of text and graphics windows, there may already be some defined and, therefore, it is not necessary to create them. These can be viewed as they are going to be on the printer with the Preview option.
If you want to print the page that is being edited, the Print option will be used. In this you can define the printer in high quality with Near Letter Quality, in low with Draft Quality, have an Epson printer in the case of the PCW 9512, with Epson Compatible Printer, or use that of the PCW 8256/8512 with Amstrad PCW Printer.
Previously we commented that there is a fund menu made up of six options. These are used to define the writing format in the texts, just like Locoscript does: Pica, 10 characters per inch: Elite, 12 characters; Condensed, 17 characters; Double Pica, 5 characters; Double Elite, 6 characters and Double Condensed, 8.5 characters per inch.
With everything seen so far, the reader can now define the sheet to be used in Locoscript. To achieve this, you must activate the Modes menu, select the Create Graphics Window option and go to the upper right grid that represents the page. Starting from the top left corner to the top right corner and as high as you see fit, extend the viewport.
If you want to put footers on the page, you must carry out the previous operation, unless the window is located at the bottom of the screen.
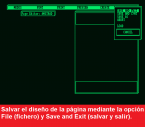
Once the design has been made, it will be saved to disk using the File option. This option not only allows you to save a file after determining the job (Save and Exit), but also allows you to save and continue (Save and Cont), save the file with a different name than the one used in the creation (Save As) , abandon the edition with Abort (losing the work done) and load other designs already made with Load.
Summarizing from a menu located on the left of the screen we choose Create text window or Create graphics window; with the cursor we give dimensions to the window on the figure of the A4, and then we give it a name. At any time we can return to the page editor and move the windows if we consider it necessary, or delete them or add new ones.
Also in the page editor is the print menu, which allows us to choose between the PCW printer or another connected to the Centronics port, and between low and high print quality. We also have a “Preview Page” option, which allows you to see a reduced representation of the full page on the screen, to get an idea of how it will look later on paper. By the way, before we commented that in theory you work on A4 paper. The truth is, when it comes to printing, it doesn't fit on an A4 or 11-inch continuous sheet of paper, but it does fit on a 12-inch continuous sheet of paper. In any case, the solution is simple: just take it into account and not use the bottom of the page to the limit.
Chart Editor
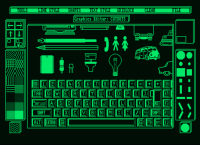
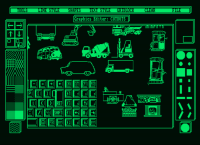
It is possibly the most powerful and attractive part of the program. A menu of tools gives way to the possible actions, which are quite a few: Points, Lines, Continuous lines, Rays, Rectangles, Triangles, Ellipses, Freehand drawing, Brush, Zoom, Fill surfaces, Copy areas, Move areas , Text in graphic mode, Inversion of colors of an area, Cut an area and save it to disk and paste it in the drawing.
We can also capture images obtained from other programs, such as Master Pack.
When entering the menu, seven possible options appear, of which: File has already been commented on in the page editor. Starting from the left of find Tools, composed of 17 possibilities. Point paints a point: Line draws a line; Lines draws multiple lines until the CAN key is pressed; Rays paints stripes that can be moved anywhere on the screen once their length is marked; Box draws squares or rectangles; Triangle paints triangles; Ellipse draws ellipses; Freehand makes the cursor paint where it goes; Brush, using the format of the cursor on the right side of the screen and with the pattern that is selected, will draw when the cursor moves; Fill fills a defined area of the drawing with a pattern; Text inserts text between the graphics. The following options act on windows or areas of the screen; Copy copy; Move allows graphics scrolling; Cut saves the selected window to disk; Paste loads a graphic file from disk.
Lyne Style is the second option on the main graphics menu and affects everything related to drawing lines, except fill and brush. It can be selected to paint black with Color and Background or green with Color and Foreground. If the size of the line is very narrow, with Thickness it can be changed, existing three different models. And finally, Style, which allows you to define the dotted line.
Shapes is a DTP utility used for Tools functions; Box, Triangle and Ellipse. It affects the contours they make and the background they contain, in such a way that by selecting Outline the figure without a background is achieved, with Solid the opposite process is carried out, it marks the background but not the edges. And finally, Outline & Solid marks both borders and backgrounds.
Although it is not the editor itself, from here you can include texts with the Text Style option. It allows to use all the backgrounds of letters found in the text editor, as well as to place the text in the most suitable way for the user. This way you can invert it, justify it to the right or left, center it and position it vertically facing both sides. To select the type of text, place the cursor on Read Font and press Enter. Once this option has been made, a window appears containing all the possible backgrounds. As they occupy the entire window, by placing the cursor on the words UP and Down, you can move it to locate more files.
Gridlock is a utility that can be somewhat complicated to use, although it is easy to learn. The cursor moves up and down the screen by the same number of pixels in each direction. Sometimes it can be inconvenient to perform this displacement in defined tables, where the height does not usually coincide with the width. To solve this problem in DTP there is the Gridlock option. It is convenient to know that the program understands by X axis the horizontal movements, and Y axis the vertical ones.
Clear, the last option in this menu, allows you to clear an area of the screen with screen and the entire page with windows..
In summary, another menu allows us to change the color of the lines (pen or paper), the thickness (four different thicknesses) and the style (from continuous to points, going through various combinations; a total of 16 types of line). We also have a Shapes menu, with which we can decide if when drawing a polygon we want only the silhouette, only the filling or both things together.
A new menu allows you to choose the character font in graphic mode, the direction of writing and the mode (green on black or black on green).
The grid menu allows you to deactivate or activate it in six different proportions, and we also have a file menu. Apart from the menus “with words”, we have permanently on the screen the menu of patterns for filling, the menu of brushes and the menu of movement of the graphical screen on the window that is being edited.
Text editor
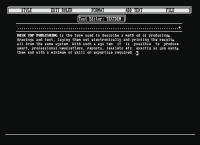
The text editor allows you to edit the text windows. We have the possibility of writing in black, italics, underlined, superscript and subscript and, of course, we can mix these types of writing. We can also select the format slider to place the tabs where we want and we can right-justify or center-justify the text.
We can enter the text by keyboard or include it in an ASCII file on the disk created with any word processor that saves files in ASCII format, such as Locoscript, ED or the Mini Office editor itself.
We will now explain the last three options of the main menu: Edit Text, Edit Font and Disc Filing.
We begin the explanation with the first of them, Edit Text (text editor), we find the same work philosophy as the Edit Graphics option already mentioned. Hence, the text file must be defined in the edit pages menu.
Siguiendo el proceso de creación de una página, se definirá una ventana de texto con la opción Modes, y dentro de ésta Create Graphics Window.
Once this window has been created, and a name declared for it, this option is left by File and Save and Exit. Back at the main menu Edit Text is selected. Within this option a window will appear requesting the name of the text file to be edited.
Five options are available in the text menu: Style, Edit Ruler, Format, Add Text and File. Of these, File was already explained above.
Style allows you to vary the font with which the text is written, having five possibilities: Bold, Italic, Underlined, Superscript, Subscript. The way to select these options, as for the rest, is to place the cursor on the options and press Enter. This method can be inconvenient when writing a text whose content is made up of several fonts. Then, the need arises to find a more simplified way to carry out this process: by pressing the (+) key located to the left of the space bar, or the (-) key located to the right, and the identification keys of the types of letter it is possible to change the model. To select Bold type, press I, for superscript, B, for subscript, Sb, and for underlined, UL.
The rule editor (Edit Ruler), although initially it can be used to define letter formats, its only use is to put tabs on the text. Selecting this option will place the cursor in the left corner of the point box. This is where you must, by moving the cursor with the direction keys, place the tabulators by pressing the TAB key. To exit, just press the CAN key.
The format menu (Format) allows you to select the placement of the text on the page: selecting Right justify, justifies the text to the right, with Center Justify, centers the lines of text, and finally, Window Length Lock, adjusts to the right. window defined in the pages option in proportion to the text length.
Using the Add Text option, you can write a text in Locoscript and pass it to Desktop Publisher (ASCII FIle). In order to carry out this option, it is necessary to have the file saved in ASCII mode with the f7 option from the Locoscript main menu and have an ASC extension. The other option, Text Window, allows you to add text to the activated window (in this case, a window is understood as the text files created with this option) from another window.
Font Editor
The font editor takes full advantage of the graph editor and actually selecting it brings us into the graph editor with the Zoom option selected and the grid enabled in X=16, Y=16 mode.
The disc and background editor
The background editor does not have its own options, since, once the file to be modified or created has been selected, it extracts all the characters they are made of so that they can be modified with the graphics editor. That is, background files are treated as image files.
Disc Filing is the option that DTP uses to work with the files. You have four possibilities: Rename; changes the name of the selected file, Copy; make copies of files, Delete; delete files and, finally, Directory; returns a directory on disk.
All options are divided into five others: Page, pages; Graphics Window, graphics files; Text Window, Text files; ASCII, ASCII type files, and FONT, background files- Thus, if we select Rename and Page, we rename a page file.
Compatibility
The Desktop Publisher is fully compatible with PCW 8256 - PCW 8512 - PCW 9512, as long as, in the case of PCW 9512, we connect an Epson compatible dot matrix printer.
Conclusion
The Desktop Publisher is generally easier to use in all aspects, and the results are as good or better than those obtained with Newsdesk. We are faced with a package that meets the needs of both those who use it as a high-level desktop editor and those who only want to use it to draw.
Packing
Cover
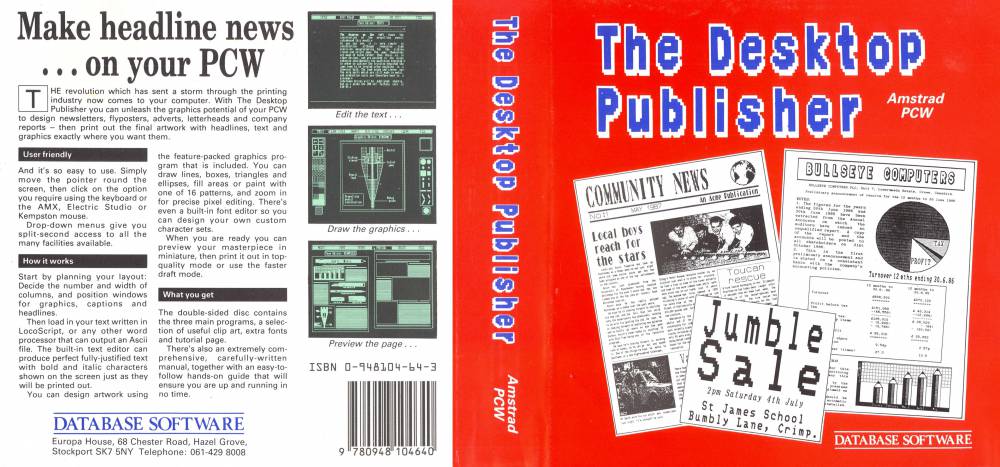
- Here you have the original cover.
- Here you have the restored cover.
Actual measurement of the cover: Width: 35.30 cm x Height: 16.50 cm
Disks
Labels
Custom labels to print. Over the years due to their use, the labels are damaged and lose their color and quality. Now we try to adapt the most similar to the extent of our possibilities, the labels so that they can be printed and replaced or for those of you who work with a copy of the program and preserve the original disc. Measurement in 3“ height: 7.00 cm - width: 7.10 cm. The first image corresponds to the original label of the game, the second is the same label modified to replace the broken one.
Extras
- Improve our letters with Desktop Publisher.
After the explanations of all the options of the page and graph editors in the description. We will go on to detail the process to follow for the composition of a sheet with footers and headers to use in Locoscript.
As already indicated in the description to design a graph in DTP it is necessary to go to the pages menu. In it, the Create option will be selected to create the page in which the file to be used for the graph will be defined. After entering the name of the page and activating the Modes menu, another Create option will be chosen again: Create Graphics Window. This will allow to create a graphic window, which will be called later from its corresponding editor to design it.
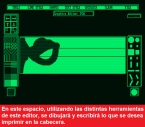
Directing the cursor, once the option has been selected, towards the page located on the right of the screen (box that extends from the center of the monitor to its maximum limit on the right), it will be located in the upper left corner of the screen and enter will be pressed. Next, using the cursors, the window that defines the header will be designed. Once finished and placed in the desired place, press enter again.
Once the previous process is finished, a box will appear where, as to create the page, it will request the name of the graphic window. If you want to put a page footer in addition to a header, you will do what you have seen so far, but placing the window at the bottom.
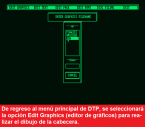
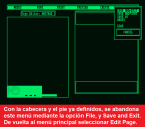
So far we have defined a blank sheet in which two spaces are reserved, one in the header and one in the footer. These do not contain any data (referring to data, the drawings and text that are intended to be entered). Therefore we must save this definition with File (file), and within it, Save and Exit (save and exit). Doing this will return to the main menu, from where you will access the graphics editor (Edit Graphics).
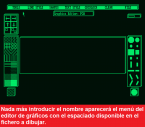
After entering the name of the file, which must be the one that was given when the graphic window was designed, a rectangular or square area will appear, depending on the size that has been entered for the window, totally blank. This area will be the one used, with the various tools of the graphics editor, to fill in the header and footer. DTP has a file of icons on side B of the disk, which can be used to decorate these areas.
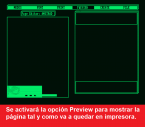
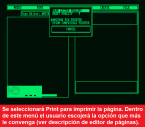
Once the header and footer have been drawn, you will go to the main menu, but not before saving the information with File and Save and Exit. Once again we find the main DTP menu, from where we must go to the page editor to print the designed model. Within it, Preview will be selected to see a sample of the page that has been made. Then, it only remains to select the Print option and choose the type of printer and its quality.
- Advertising
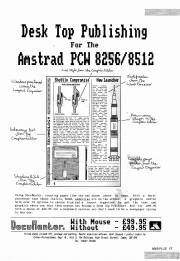
Some advertisements for the game in high-circulation magazines of the time.
Download
Program
The disc images, obtained from the original version of The Desktop Publisher, have been recorded and verified.
- The Desktop Publisher (.DSK file compressed in ZIP format)
Manual
Below you can download the manual for The Desktop Publisher program or view it online. Its measurements are width: 13.50 cm x length: 14.10 cm.
- The Desktop Publisher Manual (PDF File)


