Table of Contents
Pro Scan
| Company | Creative Tecnology |
|---|---|
| Distributor | Creative Tecnology |
| Year | 1990 |
| Packaging | Cardboard box |
| Compatibility | PCW 8256 - PCW 8512 - PCW 9256 - PCW 9512 |
| Hardware | To the PCW Expansion Bus |
| Gender | Scanner |
| Language | English |
| Price | England: £ 179.00 |
| Status | Preserved |
Screenshots
Description
The CT Scanner from Cirtech is an image capture device that connects to an interface placed on the expansion port of the PCW.
Interface functions
The interface that comes with ProScan has been developed by Cirtech. Its function is to read the information from the scanning head in the PCW and its software. The most technical feature it has is a RAM (Random Access Memory) buffer that allows head data to be fed into the PCW at a rate that both can handle.
Although you will need Flipper 2 Plus to be able to switch between ProScan and any other software. Toggling between ProScan and Micro Design II means you can scan an image, save it as a .MDA (Micro Desig Area) file and by pressing [SHIFT] + [EXTRA] + [EXIT], you can directly load it into a Micro page. Design without restarting (restarting the PCW).
Without wanting to skew the reading of this review too much, and without sounding too much of an exaggerated delusion, Creative Technology has succeeded with ProScan. First, they wowed all the critics with Micro Design, a desktop publishing system that went faster than anyone thought possible. Now they have confused naysayers with a handheld scanning device that turns the PCW into a serious desktop publishing tool.
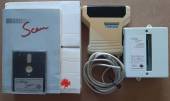
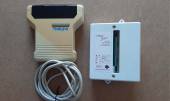
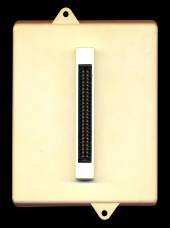
ProScan is a manual scanning device. The package consists of an interface, a small white box that connects to the expansion card that sticks out of the back of the PCW, the scan head itself, this is the equipment that you have and that converts the images into graphic images for use in Micro Design, and the software that drives the entire operation.
These are the basics. Before we get into the bulk of this review, which will be blatantly positive, we will mention the few negatives of ProScan. The reason for this is to get them out of the way quickly so that we can get on with what is good. This review is based on a preview version of the ProScan release.
First of all, the buttons on the side of the scan head can be a bit small for many of us. Second, you will need to have Flipper 2 Plus or upgrade if you want to use them together.
Well, the negatives have already been addressed. Now let's move on to the full review.
Knowing the device
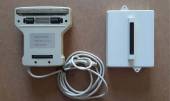
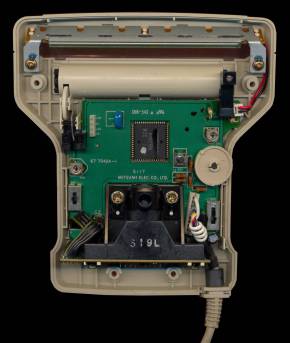
The scan head itself is a simple device in terms of appearance and function. It looks quite like T with smooth curves. In its lower part there are three rollers that allow the device to move smoothly and safely on flat surfaces. There is also a clear plastic cover under which the scanning mechanism is located. It emits a green light when it is scanning.
On the right side, at the top of the scanner, there is a wheel that is used to control the brightness of the image as it appears on the screen. This is not a purely cosmetic feature, as it also controls the brightness and contrast of the saved file. On this side of the scanner, there is also a four-way slide switch (too small). You have to experiment with it to use it correctly. Its role is to control the quality and the way the image is scanned. The four settings of this control basically allow us to obtain the gray tones and the texture of the image (the dithering and the stippling) to our liking. The documentation is pretty vague at this point.
On the left side of the scanner there is a three-way slide switch that controls the rate of dots per inch (dpi) with which the image is scanned. Logically, being a three-way switch, there are three levels of 200, 300 and 400 dpi, although the switch is labeled H, M and L. In practical terms, the level of dots per inch basically corresponds to the size of the scanned image. As a very rough example, 400 dpi would make a quarter of an A4 page fill the working area on the ProScan screen. While experimenting with different images (line drawings require one setting, color images another, and so on), you can create a ProScan job log (a list of image types and switch settings) that will be helpful in the future.
In general, the scan head itself is a simple “kit” with a large number of options to provide a wide variety of image reproduction. We wouldn't have been surprised to hear of a “sub-industry” setting (in the same way that additional fonts and clipart are available) to provide combinations of settings for the best results. Finally, there is a flat gray switch on the top of the scanner that starts the scanning process. Click on it once and a red light will appear at the top right of the scanner to indicate that it is ready to scan. Click again and the scanner will go into standby mode. If you leave the scanner on without moving it for more than a minute, it will turn off automatically.
Three in one
As we've already mentioned, ProScan is a three-part project: interface, scan head, and software. The interface, from Cirtech, comes with a through connector that will allow you to mount any of the other interfaces you have, such as the SCA RamPac or the Centronics parallel / RS232 serial interface, without losing any of its capabilities. This is useful if you want to use the Kempston or AMX mice, which require their own interfaces. Both mice are also compatible with ProScan and Micro Design.
Once you've connected the interface to the back of your PCW (the manual, thankfully, walks you through this process in detail, warning us to turn off and unplug the PCW before we begin, otherwise there is a danger of burn the Z80 chip) we are ready to connect the handheld scanner. This is a simple operation. The scanner head has a cable coming out of it with a DIN plug on the end. This plug fits comfortably into the interface socket. Once this connection has been made, and having made a copy of the ProScan software (see the box for the installation procedure), we will have it ready to start using it.
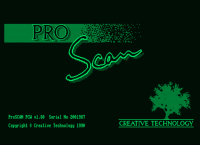
If a bootable ProScan disk has been created, this means placing it in drive A: and seeing the home “page”, which looks a lot like Micro Design II, when the screen starts up. When it finishes installing, the next one will take us to the main work screen.
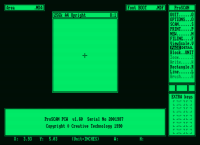
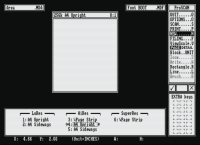
Again, this looks a lot like Micro Design - a nice touch of consistency. On the left side of the screen, there are a series of menus. These can be accessed by clicking the mouse or using the keyboard. The options are as follows:
QUIT: Pretty simple; This takes you out of ProScan and returns you to the CP / M prompt.
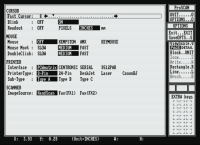
OPTIONS: This option takes you to the configuration menu where you can define the printer and mouse types.
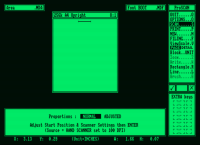
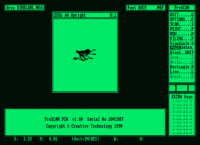
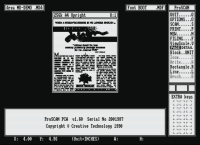
SCAN: This option takes us to the scan screen. This fills your PCW screen and leaves a thin bar at the top with a message telling you to press [CAN] to restart the scan or any other key to cancel. All you have to do is hold the hand scanner over the required image and move it down. As you do this, the image appears on the scan screen.
You can modify the contrast and dippling (or dotting and dithering) effects as you go. Once the scan has reached the bottom of the PCW page (which may exceed the length of the screen itself), it will automatically return to the main screen. By the way, when scanning, if we go too fast or at the wrong angle, the PCW clicks on you (just before it happens) to warn us that the image will be adversely affected.
PRINT: Again, it's pretty simple. Once you have configured your printer in the options menu, the PRINT option allows us to configure the type of paper (simple or continuous), the size of the margins, the number of copies, etc. We press [ENTER] and it will start printing.
NEW: This clears the working screen and clears any images from memory.
FILING: Allows you to load and save MDA and font files. Saved files can be uploaded to Micro Design for more detailed work.
VIEWSCALE: Combine with PAGE, for full edit screen in the same way as Micro Design, or DETAIL. The DETAIL page opens other ZOOM options for pixel editing of images. WRITE allows us to add text (using any Micro Design font) to images, and BRUSH offers spray and brush effects to enhance images.
BLOCK … UNIT: Allows you to define areas to copy, invert or erase.
RECTANGLE: Create rectangles for the edges of images or text boxes.
LINE: It allows us to draw lines.
Install Pro Scan
Creative Technology has prepared an installation program for ProScan. It is a program called PSMAKE.COM. PSMAKE is executed from the CP / M Plus prompt A> and allows us to adapt the main program to our needs.
After typing PSMAKE at the prompt, we are asked a series of questions where we will answer Yes / No. The general principles are as follows. The ProScan software is copied to a disk - formatted or unformatted - just make sure you have a blank disk handy. You are asked if you want a ProScan bootable disc (for the more technical, this is “starts by itself”). If you answer yes, you will be prompted to insert your CP / M Plus disk into the drive. On that disk you will have a file called J14CPM3.EMS (the numbers may vary depending on the version, but the .EMS will always be the same). This is the file that actually starts your PCW. This file is copied to your new ProScan disk.
Then he asks us if we have a mouse and which one (the Kempston or the AMX? Come on. SCA and Creative. He asks you how fast you want the mouse cursor to move, and then which printer do we have. PCW, a 24-pin printer, a laser printer, or even a Deskjet printer? You ask several more questions and what you get is a working copy of ProScan and a fully functional options file. we might want to start working with ProScan.
Conclusion
Scanning an image with ProScan couldn't be easier. We just need to find the image, of a book for example (although we would really have to scan anything above A4 into two chunks and then stitch them together).
An interesting point about this is that you do not have to rush to photocopy bright or colored images to capture them correctly. To cite a topic, in the tests we managed to scan through a transparent sheet of methacrylate and continue to obtain a sharp image. Once the image is captured, we can retouch them with the brush, zoom and writing functions integrated in the software or export it to Micro Design.
In conclusion, Creative Technology has produced a cheap but not vulgar scanning package with an excellent value and a great product. Images captured with ProScan can be added to any newsletter, poster, or desktop publishing project.
Disk
Label
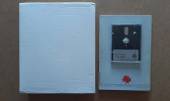
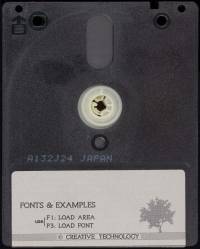
Custom labels to print. Over the years due to its use, the labels are spoiled and lose their color and quality. Now we try to adapt the most similar in the measure of our possibilities, the labels so that they can be printed and replaced or for those who work with a copy of the program and preserve the original disc. Measurement in 3 “height: 7.00 cm - width: 7.10 cm.
Coming soon
Extras
Interface
Interface v1.5 of the scanner manufactured by Cirtech for PCW8256 / 8512 and PCW9512.
Interface v1.6 of the scanner manufactured by Cirtech for PCW8256 / 8512 and PCW9256 / 9512.
Scanner
Handheld scanner 1.5, manufactured by the Japanese company Naksha.
Hand scanner 1.6, manufactured by the Japanese company Naksha.
Download
Program
The disk images, obtained from the original version of ProScan, have been recorded and verified.
- Pro Scan v1.60 (.DSK file compressed in ZIP format)
Manual
Below you can download the manual and instructions for the Pro Scan program or view it online. The manual sheet measures: Width 14.50 cm x Height 21.20 cm.
- Manual Pro Scan v1.1 (PDF file)

